Supplies:
Paverpol (available at lisasheaven.com) order it before freezing temps hit your area as the product cannot freeze during shipment or it will be ruined.
Beaded Tassels: I got mine at Cost Plus World Market, but many Christmas stores, Bombay Company and other places have inexpensive tassels.
A scrap paper face: I have a picture of one here you can copy (I own the original Victorian piece it came from)
Fabric for draping: I used chiffon with glitter dots on it.
Trims: Wired ribbon, trim, Christmas themed embellishments, silk flowers etc.
Plastic garbage bags and plastic ties.
Start by covering your work surface with plastic..I
 used the garbage bags. The Paverpol will not stick to it. Arrange your tassel on the plastic.
Cut a small rectangular piece of fabric...think of it as a "scarf" for your doll. I used several different sizes but about 8 inches long by 3" wide seemed to work best.
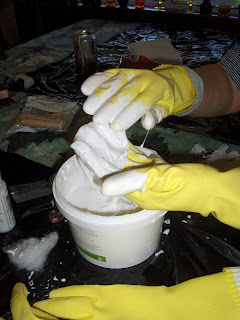
Dip you fabric in the paverpol and use your fingers to wipe it off. You can use gloves or not.
Arrange the wet paverpol around the top of your tassel. Make sure you keep the top hanging loop of the tassel free so it can still hang.
I arranged my fabric under the tassel and then brought the ends of the fabric forward, around the tassel and "wrapped" it.
You will need to arrange the ends of your wet fabric in a "pose"...maybe your scarf is being windblown and the ends stick out, maybe its wrapped with the ends tucked under...use you imagination and play with it. You have about 15 minutes to pose it...maybe longer. I find the wet paverpol is easier to work with after it has started to dry.
Remember to leave a space to tuck your head in the scarf area...I forgot to take a picture before I put the head in!
If you need to cinch the scarf, use a plastic tie...this will not stick to the paverpol. I left mine on the table to dry over night and then hung them up to dry the 2nd day...I found it took 2 days for them to be completely dry.
Once the paverpol is dry it is time to add your face. I used a face glued on a bottle cap. These are available at scrapbooking shops or on-line. You can also just use heavy cardboard to glue your face on to...then cut it out and glue it into the pavepol "hood" you have made.
Now you get to embellish to your heart's content! I used wired tinsel trim and white iridescent silk flowers.
Once you are done...hang her on your tree!
Have fun making your own Tassel Ladies!


7 comments:
THANK YOU Noel! They are so sweet I have to make some -- and I already have most of the supplies!
How sweet to put the tutorial up for us, they are so pretty.
Thank you, Noel. These are so pretty. I hope I can find some time (and tassels) to make some!
Thank you so much for the wonderful tutorial. The tasselles really beautiful
ANd thanks from me too Noel!! I love these tassle dolls and cant wait to make some!! jandee
These are so pretty! Thank you for sharing how to make them.
What a lovely idea - thank you!
Post a Comment